Phaser Tutorial: HTML5 Racing Game
Phaser offers beginners in game development the opportunity, to create HTML5 based games. In this tutorial, I want to explain the entry in Phaser with the help of a racing game, we will create. The whole source code is available at the end of this post. If you want to have a look at what the finished game looks like in my case, try the Anexia Schlepperacer
1. Introduction
To integrate Phaser into your own project, you can download it from the official Site, or use a CDN.
In my case, I used a CDN, so i just had to use the following script tag to integrate Phaser in my project:
<script src="https://cdnjs.cloudflare.com/ajax/libs/phaser/2.4.8/phaser.min.js"></script>
Warning: This script tag will integrate Phaser 2.4.8 in your project, please check if there is a newer version available first!
A Phaser game consists basically of 3 functions: preload, create & update.
The preload function ist the entry point of the game and will be called first. It is (as the name says) here where to load files like graphics, bounding boxes, fonts, scrips, sounds and so on. A typical line of code in the preload-function will look like this:
game.load.spritesheet('map','assets/map.jpg');
The create function will be called after the preload-function. In this function, you have the opportunity to run code, that will only be called once, when all files are already available. There is already some action going on here: Most graphics get added to the game, bounding boxes are mapped, particle effects and animations are initialized and configured and the physics, text or keys, to get user inputs, are loaded and configured here.
In the update function the real action is going on. This function will be called everytime a frame gets rendered. Here will user inputs & collisions be handled, sprites moved,etc.
To initialize a Phaser game, you must only include one line of JavaScript into your project:
var game = new Phaser.Game(1280, 839, Phaser.AUTO, 'main_game', { preload: preload, create: create, update: update });
The first 2 parameters set the height and width of the game in pixel. The size of the game can also be changed later, to make the game responsive for example.
With the 3. parameter, you can choose how the game should be rendered (WebGL or Canvas). Normally, you set this to Phaser.AUTO, this will try to use WebGL, if this fails, it will use Canvas.
The 4. parameter is the ID of the Div, in which the HTML element of the game will be placed. You can leave this empty, if you don’t need any HTML properties.
In the last parameter we will hand over Phaser the preload, create & update function. (Leave this 3 functions empty for the moment)
2. Initialize Car & Map
For our racing game we first need a map, on which the car can drive on, and a car. From this moment on, you will need a webserver, because the browser doesn’t have the permission to access local files on your PC. You can use XAMPP or (depending on your system and taste) a similar service.
Here is the map I was using with our office building:
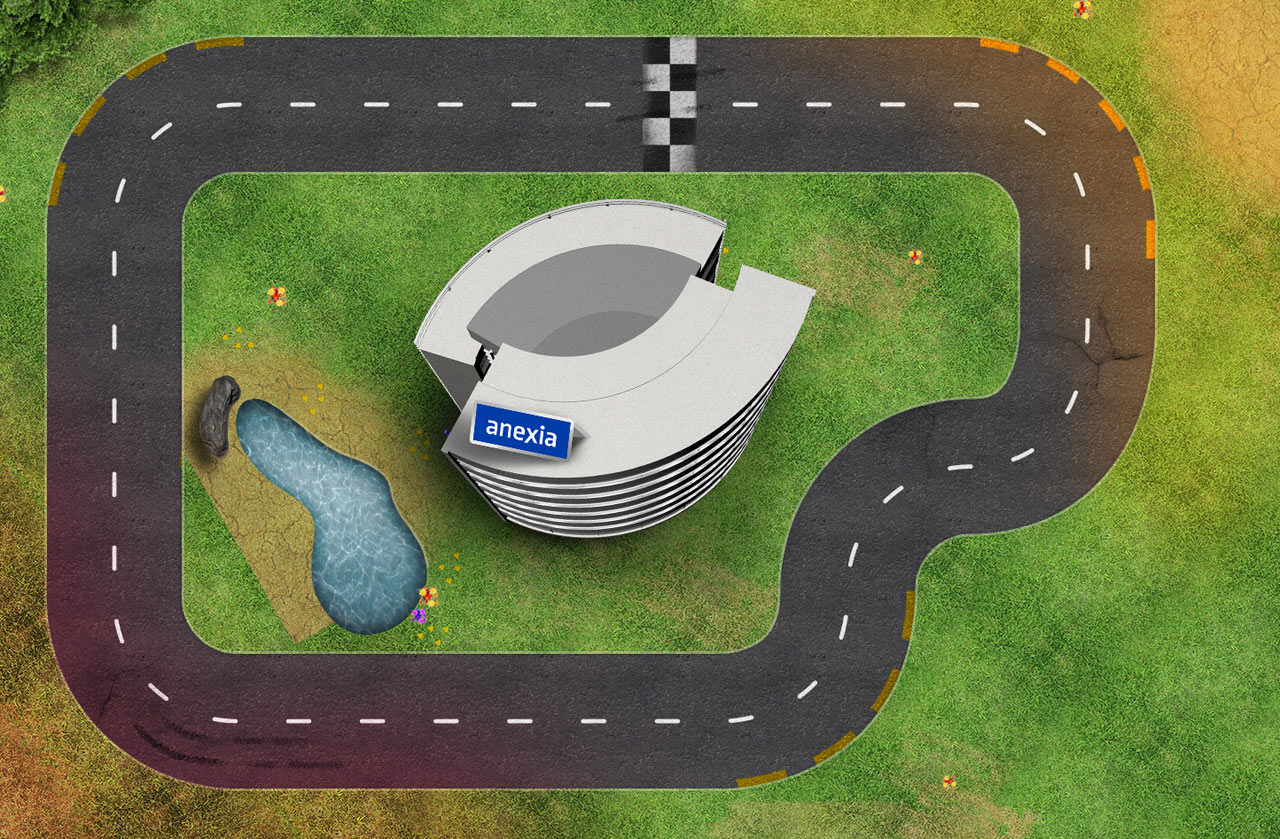
And here is the car modeled after our Anexia van:

To add graphics into our game, we first have to load them in our preload function:
function preload() {
    game.load.spritesheet('map','assets/map.jpg');
    game.load.spritesheet('car','assets/car.png');
}
You can choose any string for the first parameter, you need this name later to add your image to the game.
The second parameter is the path to the file.
Now, the image is loaded, but we still have to add it to the game. We do this in our create function:
function create() {
    /*Adding Map*/
    var map = game.add.sprite(0,0,'map');
    /*Adding car*/
    car = game.add.sprite(570,100,'car');
}
The first 2 parameters here are the coordinates (X,Y), where the image will be placed. The 3. one is the name of the image, which we were chosing in our preload function.
If you run the game now, you should see the car and the map as background.
Now, let’s move to the steering of the car!
3. Car Steering
To know in which direction the car should drive, we have to get the user input from the keyboard first. To do so, we have to tell Phaser, which keys we need data from.
Let’s make a global variable called “cursors” first:
var cursors;
In the create function we can tell Phaser, that we will need all “cursor-keys”, (this are all arrow keys) with the following line of code:
cursors = game.input.keyboard.createCursorKeys();
We can now read, if the user is pressing the “arrow-up” key with:
if (cursors.up.isDown) {
}
To set a velocity to our car, we have to enable a physics engine first. Phaser is coming with some physics engines on its own, mostly you will find the “arcade” engine on the internet. We can’t use this one, because it doesn’t support complex bounding boxes. The P2 engine does so, which is why I decided to use it. To start the P2 engine, we have to add the following line in our create function:
game.physics.startSystem(Phaser.Physics.P2JS);
Now the physics engine is started, but we need to enable it for our car:
game.physics.p2.enable(car,false);
Lets’s turn the car 90 degrees, so it’s aligned with the road:
car.body.angle = 90;
Now it’s finally time to set a velocity to our car. Create a global variable for this purpose which is “0” at the beginning:
var velocity = 0;
Now to the code, that moves the car:
if (cursors.up.isDown && velocity <= 400)
        velocity+=7;
else {
    if (velocity >= 7)
        velocity -= 7;
}

car.body.velocity.x = velocity * Math.cos((car.angle-90)*0.01745);
car.body.velocity.y = velocity * Math.sin((car.angle-90)*0.01745);

if (cursors.left.isDown)
    car.body.angularVelocity = -5*(velocity/1000);
else if (cursors.right.isDown)
    car.body.angularVelocity = 5*(velocity/1000);
else
    car.body.angularVelocity = 0;
It is actually quite simple:
if (cursors.up.isDown && velocity <= 400)
        velocity+=7;
else {
    if (velocity >= 7)
        velocity -= 7;
}
If the arrow-up key is pressed and the velocity is smaller than 400 pixels/second (this is the maximum velocity), it will be increased. If the arrow-up key is not pressed, the car will slow down.
After this, we will calculate the velocity for the X and Y axis:
car.body.velocity.x = velocity * Math.cos((car.angle-90)*0.01745);
car.body.velocity.y = velocity * Math.sin((car.angle-90)*0.01745);
Af first, we will substract 90 degrees from the angle of the car. (we rotated the car first by 90 degrees, if we wouldn’t do this the front of the car would be on the right side for the physics engine). Then we convert the angle to radiant (*0.01745), take the cosinus function of it, multiply it with the general velocity and we get the velocity of the car on the X-axis.
We have to do the same for the Y-axis, but with the sinus function instead of the cosinus function.
Then we will set the rotation of the car:
if (cursors.left.isDown)
    car.body.angularVelocity = -5*(velocity/1000);
else if (cursors.right.isDown)
    car.body.angularVelocity = 5*(velocity/1000);
else
    car.body.angularVelocity = 0;
The velocity of the rotation depends on the velocity of the car. If the car is slow, it will also steer slow.
Because the code got a bit complex right now, here ist the whole thing:
<html>
    <head>
        <title>Tutorial</title>
        <script  src="https://cdnjs.cloudflare.com/ajax/libs/phaser/2.4.8/phaser.min.js"></script>
    </head>
    <body>
        <script>

            var game = new Phaser.Game(1280, 839, Phaser.AUTO, 'main_game', { preload: preload, create: create, update: update });

            function preload() {
                game.load.spritesheet('map','assets/map.jpg');
                game.load.spritesheet('car','assets/car.png');
            }

            var cursors;
            var velocity = 0;
            function create() {
                /*Enable Phyics Engine*/
                game.physics.startSystem(Phaser.Physics.P2JS);
                /*Adding Map*/
                var map = game.add.sprite(0,0,'map');
                /*Adding car*/
                car = game.add.sprite(570,100,'car');
                game.physics.p2.enable(car);
                car.body.angle = 90;

                cursors = game.input.keyboard.createCursorKeys();
            }

            function update()
            {
                /*Update Velocity*/
                if (cursors.up.isDown && velocity <= 400) {
                        velocity+=7;
                }
                else {
                    if (velocity >= 7)
                        velocity -= 7;
                }

                /*Set X and Y Speed of Velocity*/
                car.body.velocity.x = velocity * Math.cos((car.angle-90)*0.01745);
                car.body.velocity.y = velocity * Math.sin((car.angle-90)*0.01745);

                /*Rotation of Car*/
                if (cursors.left.isDown)
                    car.body.angularVelocity = -5*(velocity/1000);
                else if (cursors.right.isDown)
                    car.body.angularVelocity = 5*(velocity/1000);
                else
                    car.body.angularVelocity = 0;
            }
        </script>
    </body>
</html>
4. Collision Detection:
Next we want to focus on the collision detection. To create complex bounding boxes, I’ve used the Physics Editor. I don’t want to explain the usage of this program here, there can already be found many informations about this. The physics editor will generate a JSON File, which will contain all bounding boxes. We load this file in the preload function:
game.load.physics("collision","assets/collision.json");
I will explain the collision with the building in the middle of the map here, it’s rougly the same for other objects.
Because the building is 3-dimensional, I wanted that the car to be able to drive “under” the building. That should look like this:
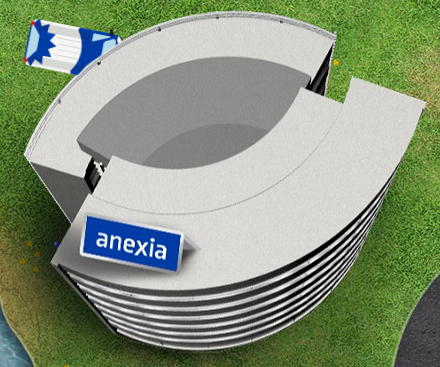
To do so, you have to cut the image and save it as a PNG File with a transparent background. We will add the building at the end of the create-function, like we did with all the other images. To make sure, the image of the car lies underneath the image of the building, we have to add the image of the building after the car.
Then we have to create collision groups for the objects:
var carCollisionGroup = game.physics.p2.createCollisionGroup();
var buildingCollisionGroup = game.physics.p2.createCollisionGroup();
game.physics.p2.updateBoundsCollisionGroup();
Now we have to add the building to the game (after we loaded the image in the preload function):
var building = game.add.sprite(640,420,'building');
Then we enable the physics engine for the building:
game.physics.p2.enable(building);
We’re configuring, that the building is an immovable object:
building.body.kinematic = true;
Then we’re deleting the bounding box, that is laying on the building on default:
building.body.clearShapes();
And we’re loading our own bounding box, which we’ve exported from physics editor earlier:
building.body.loadPolygon('collision','building');
Now we map the collision groups to the car and the building:
car.body.setCollisionGroup(carCollisionGroup);
building.body.setCollisionGroup(buildingCollisionGroup);
And last, we’re configuring, that the car and the building will collide:
car.body.collides([carCollisionGroup,buildingCollisionGroup]);
building.body.collides([buildingCollisionGroup,carCollisionGroup]);
Hint: If you have problems with the bounding box, try the following:
game.physics.p2.enable(building,true);
If you set the second parameter to be “true”, the bounding box of the building will be displayed. This helps with debugging if it is mapped wrong. 😉
If you have done everything right, you now have the basic game to create your own HTML5 Phaser racing game!
If not, you can download the whole game here: HTML5 Racing Game
If you have any further questions, write me an E-Mail.
You want to know what happened to the game in my case?
Visit out Anexia Schlepperacer on Facebook and have a look at it, you can also win an iPad Air 2, if you have the best time until 1. Juli 2016
You want to create your own social media application but don’t know how?
Anexia would love to create it for you, visit us here.